WNTR requires 64-bit Python (tested on versions 3.10, 3.11, 3.12, and 3.13) along with several
Python package dependencies.
See Requirements for more information.
WNTR can be installed as a Python package as briefly described below.
Detailed instructions are included in the following section.
The latest release of WNTR can be installed from PyPI or Anaconda using one of the
following commands in a terminal, command line, or PowerShell prompt.
Python can be installed on Windows, Linux, and Mac OS X operating systems.
WNTR requires 64-bit Python (tested on versions 3.10, 3.11, 3.12, and 3.13) along with several Python package dependencies.
Python distributions, such as Anaconda, are recommended to manage
the Python environment. Anaconda can be downloaded from https://www.anaconda.com/products/individual.
Additional instructions for setting up a Python environment independent of Anaconda are available at https://docs.python.org/.
General information on Python can be found at https://www.python.org/.
Note
It is recommended to install Anaconda for a single user by selecting the ‘Just Me’ option during installation.
If a user-writeable location is selected for installation (e.g., C:\Users\username\Anaconda3), then
the ‘Just Me’ option does not require administrator privileges.
It is also recommended to add Anaconda to the PATH environment variable. This will facilitate access to Python from a command prompt
without having to include the full path name.
This can be done by either 1) selecting the ‘Add Anaconda to my PATH environment variable’ option during installation or 2) manually adding C:\Users\username\Anaconda3 to the environmental variables.
Note that the first option is not recommended by Anaconda because it elevates the priority of Anaconda software over previously installed software.
While the second option allows the user to define priority, this requires administrator privileges.
If Anaconda is not added to the PATH environment variable, Python can be run by using the full path name (e.g., C:\Users\username\Anaconda3\python).
Anaconda includes the Python packages needed for WNTR, including NumPy, SciPy, NetworkX, Pandas, and
Matplotlib. For more information on Python package dependencies, see Requirements.
If the Python installation does not include these dependencies, the user will need to install them.
This is most commonly done using pip or conda.
Detailed guidance concerning package installation using pip is available at https://packaging.python.org/.
Anaconda also comes with Spyder, an IDE, that includes enhanced
editing and debugging features along with a graphical user interface.
The IDE provides debugging options accessible from the toolbar,
displays code documentation in the object inspection window, and
shows pop-up information on class structure and functions in the
editor and console windows. Non-Anaconda users can download
Spyder from https://www.spyder-ide.org/.
For a detailed installation guide, please refer to https://docs.spyder-ide.org/.
To open a Python console, open a command prompt (cmd.exe on Windows, terminal window on Linux and Mac OS X)
and run ‘python’, as shown in Figure 3,
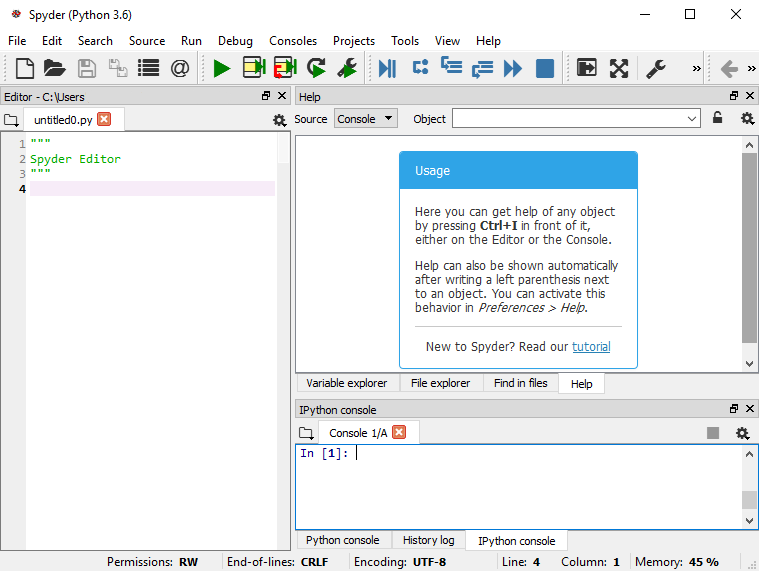
or open a Python console using an IDE, like Spyder, as shown in Figure 4.
Figure 3 Python console opened from a command prompt.#
WNTR can be installed using PyPI, Anaconda, or by downloading
a zip file and building the source code, as described below.
Information for developers can be found in the Developer instructions section.
Note
If WNTR is installed using PyPI or Anaconda (Options 1 or 2 below), the examples folder is not included with the Python package.
The examples can be downloaded by going to USEPA/WNTR, select the “Clone or download” button and then select “Download ZIP.”
Uncompress the zip file using standard software tools (e.g., unzip, WinZip) and store the example files in a folder.
Option 1: Users can install WNTR from PyPI using pip, which is a command line software tool used to install and manage Python
packages. It can be downloaded from https://pypi.python.org/pypi/pip.
To install WNTR using pip, open a command line or PowerShell prompt and run:
Option 2: Users can install WNTR from Anaconda using conda, which is a command line software tool used to install and manage Python
packages. It can be downloaded from https://www.anaconda.com/products/individual.
To install WNTR using conda, open a command line or PowerShell prompt and run:
Option 3: Users can download and build WNTR using source files from the WNTR GitHub repository.
To download a zip file of the main branch, go to USEPA/WNTR, select the “Clone or download” button and then select “Download ZIP.”
This downloads a file called WNTR-main.zip.
To download a specific release, go to USEPA/WNTR and select a zip file.
The zip file contains the examples folder.
Uncompress the zip file using standard software tools (e.g., unzip, WinZip) and store them in a folder.
WNTR can then be installed using pip, which is a command line software tool used to install and manage Python
packages. It can be downloaded from https://pypi.python.org/pypi/pip.
To build WNTR from the source files, open a command line or PowerShell prompt from within the folder that contains the setup.py file and run:
python-mpipinstall.
This runs setup.pyinstall. The -m option runs pip as a Python script.
The . indicates that the source files are in the current directory.
This use of pip installs WNTR using the local source files (not from PyPI as shown in Option 1).
Note
WNTR includes C++ code that is built into shared object files (e.g., pyd for Windows)
during the setup process. This requires that the user has a C++ compiler (e.g., Visual Studio C++, GNU C++, MinGW) on their path.
No compiler is needed when installing WNTR through PyPI (Option 1) or conda (Option 2).
Note
Mac builds and EPANETMSX
The builds of EPANETMSX for Mac require the OpenMP package be installed. This is easiest to do using
homebrew. A brew recipe is provided with WNTR that will obtain the appropriate libraries. To use it,
download the USEPA/WNTR
formula directly and brew it, or use the command below.
This should install the necessary libraries onto your machine to be able to run WNTR with EPANETMSX extensions.
To test that WNTR is installed, open a Python console and run:
importwntr
If WNTR is installed properly, Python proceeds to the next line. No other output is printed to the screen.
If WNTR is not installed properly, the user will see the following ImportError:
ImportError:Nomodulenamedwntr
To verify the version of WNTR that has been installed, continue in the Python console and run:
print(wntr.__version__)
This will print the WNTR version to the screen, for example, “1.0.0”.
See Getting started for a simple example that can also be used to test installation.
A full set of software tests can also be run locally to ensure proper installation, see Software tests for more details.
Developers can clone and setup the main branch of WNTR from source files
using the following commands in a terminal, command line, or PowerShell prompt:
The -e option runs setup.pydevelop.
This will install the main branch of WNTR from USEPA/WNTR in development mode.
The requirements.txt file contains all the necessary dependencies for testing the package
and building the documentation.
Note
WNTR includes C++ code that is built into shared object files (e.g., pyd for Windows)
during the setup process. This requires that the developer has a C++ compiler located in a folder specified in their PATH.
When installing WNTR through PyPI or conda, the shared object files do not need to be built
and no compiler is needed.
If the developer does NOT have a C++ compiler, or would rather use prebuilt wheels (a pre-built binary package format for Python modules and libraries),
the shared object files can be downloaded from WNTR GitHub Actions using the following steps:
Clone and setup the main branch of WNTR from the GitHub
repository using the following commands in a terminal, command line, or PowerShell prompt
(the --no-build command line argument omits the build step in the setup process):
Requirements for WNTR include 64-bit Python (tested on versions 3.10, 3.11, 3.12, and 3.13) along with several Python packages.
Users should have experience using Python (https://www.python.org/), including the installation of additional Python packages.
The following Python packages are required:
NumPy [32]: used to support large, multi-dimensional arrays and matrices,
http://www.numpy.org/
SciPy [32]: used to support efficient routines for numerical integration,
http://www.scipy.org/